How to Grow Butternut Squash: Sweet Orange Flesh That Stores for Months
A practical guide to growing butternut squash from a late-spring indoor sowing to an autumn harvest, including how to cure the fruits so they keep well into winter.
When to sow & harvest
A rough guide for a temperate climate - shift it to your own zone and last-frost date. Greenhouse growing stretches both windows earlier and later.
Butternut squash is the winter keeper of the vegetable garden. Of all the squashes, it is the one that stores best, and a well-grown, properly cured fruit will sit happily in a cool room for months, giving you sweet orange flesh long after the growing season is over. That storage ability is what makes it so valuable: it turns a few sprawling summer plants into a supply of good eating that carries you deep into winter.
It is not a difficult crop, but it does test your patience and your space. Butternut needs a long, warm season to ripen properly, and its vines wander far and wide, so it sits at the intermediate level. Get the timing right - start it warm, plant it out after the frosts, feed and water through summer - and it rewards you generously. Just as important is the finish: curing the fruits after cutting is what turns a decent harvest into one that actually keeps. This guide covers the whole journey.
Why grow butternut squash
The headline reason is storage. Butternut is the best-keeping of all the winter squashes, and once cured it holds for months in a cool, dry room without any freezing, bottling or fuss. That makes it one of the most genuinely useful crops for eating out of season: harvest in autumn, and you are still cooking your own squash well into the new year.
The second reason is the eating itself. Butternut has dense, sweet, nutty orange flesh with very little waste, ideal for roasting, soups, curries and mash. Home-grown fruits, ripened fully on the vine and cured properly, are sweeter and better-textured than many shop-bought ones picked and shipped underripe.
Finally, it is a satisfying, productive crop to grow. The plants are vigorous and generous, and there is real pleasure in watching those pale, gourd-shaped fruits swell and colour up through late summer. From a small number of plants you can gather enough squash to keep a household going for a long stretch of the colder months.
Choosing a variety
Butternut is itself a type of winter squash, but within it there are choices worth making, mainly around ripening speed and fruit size.
The key consideration in a cool climate is choosing a variety bred to ripen reliably in a shorter, cooler season. Some traditional butternuts need a long, hot summer to mature fully, which can be a gamble in a cool-summer garden, so look for types described as early or as suited to shorter seasons. These set and ripen their fruit more dependably where summers are not guaranteed to be long and warm.
You will also find variation in fruit size, from smaller, single-portion squashes to large fruits. Smaller-fruited varieties often ripen more quickly and reliably, and they are handy for using one at a time, whereas large fruits give more flesh per plant but take longer to mature.
For a first attempt in a cool climate, an early, reliable butternut with modest-sized fruits is the safest and most rewarding choice. Once you know your season can ripen them, you can experiment with larger or later types.
Sowing and starting off
Butternut squash needs a long warm season, so in cool climates it is started indoors in warmth and only moved outside once frost is past. Sowing too early leaves you with leggy, pot-bound plants; too late and the fruit may not ripen. Late spring is the sweet spot.
Sow indoors in late spring, roughly April to May, about a month or so before the last expected frost. Sow the large, flat seeds individually into pots of moist compost, pushing each seed in on its edge a couple of centimetres deep - sowing on edge helps stop it rotting. Keep the pots warm, ideally on a windowsill, in a heated propagator or a warm greenhouse, and the seed should germinate within a week or two. The young plants grow fast, so do not start them too far ahead of planting-out time.
Grow the seedlings on in a bright, frost-free spot until all danger of frost has passed and the weather has warmed. Before planting out, harden them off over a week or so by standing them outside during the day and bringing them in at night, gradually getting them used to outdoor conditions.
Plant out after the last frost, into ground that has been enriched with plenty of well-rotted manure or compost, since squash are hungry, thirsty plants. Give each plant plenty of room - around 90cm to a metre apart at least - because the vines sprawl widely. Water them in well.
Where to grow
Butternut squash wants warmth, sun and rich, moisture-retentive soil, and it needs a lot of room to spread. Choose a warm, sheltered, sunny spot, because sun and heat are what ripen the fruit; a cold or shady site rarely produces a good crop in a cool climate.
The soil should be as rich as you can make it. Squash are greedy feeders, so dig in generous amounts of well-rotted manure or garden compost before planting. Many growers plant on top of a mound or over a compost-filled planting hole, which gives the roots a rich, warm, well-drained base to grow into. The plants also drink heavily, so the ground needs to hold moisture through summer.
The vines are the space challenge. They ramble across the ground and can cover several square metres, so give them the run of a spare corner, or train them to trail along a bed edge, over a low structure or up a sturdy support if space is tight - though the heavy fruits then need holding up.
A greenhouse or polytunnel is not essential but is a real help in cooler areas, giving the extra warmth that ripens fruit more reliably. Even a warm spot against a sunny wall makes a difference where summers are marginal.
Day-to-day care
Once planted, butternut squash needs feeding, watering and a bit of management through the season.
Water generously and regularly, especially in dry spells and once fruit has set and is swelling. These are thirsty plants, and dry roots check growth and can cause young fruit to drop. Water at the base rather than over the leaves where you can, to reduce disease.
Feed once the plants are established and flowering. A high-potash liquid feed, of the sort used for tomatoes, applied regularly through summer, supports good flower and fruit production. Rich soil at planting sets them up, but a summer feed keeps them cropping well.
The plants produce separate male and female flowers, the females recognisable by the tiny embryonic fruit behind the bloom. In good weather insects pollinate them, but in dull, cool spells or under cover you can hand-pollinate by transferring pollen from a male flower into the females to help fruit set.
As autumn approaches, help the fruit ripen. Remove some of the large leaves shading the developing squashes so the sun reaches them, and consider slipping a tile, board or piece of straw under each fruit to lift it off damp soil, which keeps it clean and prevents rot. Pinching out the growing tips once a good number of fruits have set directs the plant's energy into ripening what it has rather than making more vine.
Common problems and pests
Butternut squash is reasonably robust, but a few problems recur.
Powdery mildew is the most common, showing as a white, dusty coating on the leaves, usually appearing later in the season. It is very common on squash and often more unsightly than fatal, but a heavy attack weakens the plant and reduces ripening. Reduce the risk by spacing plants well for good air flow, watering the soil rather than the foliage, and keeping the roots from drying out, since drought stress makes it worse. Remove the worst affected leaves.
Slugs and snails are a serious threat to young plants in particular, capable of demolishing freshly planted seedlings overnight. Protect young plants with your preferred slug measures until they are large and tough enough to shrug off grazing, and stay especially vigilant in the damp weeks after planting out.
Poor fruit set is a frequent frustration, usually down to cool, dull weather limiting pollination, or to the first female flowers appearing before there are enough males open. Hand-pollinating helps, and warmth improves matters as summer goes on.
The other main risk is simply an unripe crop, where a cool, short season leaves fruit that has not matured or coloured properly. Choosing early varieties, growing in the warmest spot you have, and helping the fruit ripen late on all guard against this.
Harvesting
Butternut squash is harvested in autumn, once the fruits are fully mature, and getting the ripeness right matters for both flavour and storage.
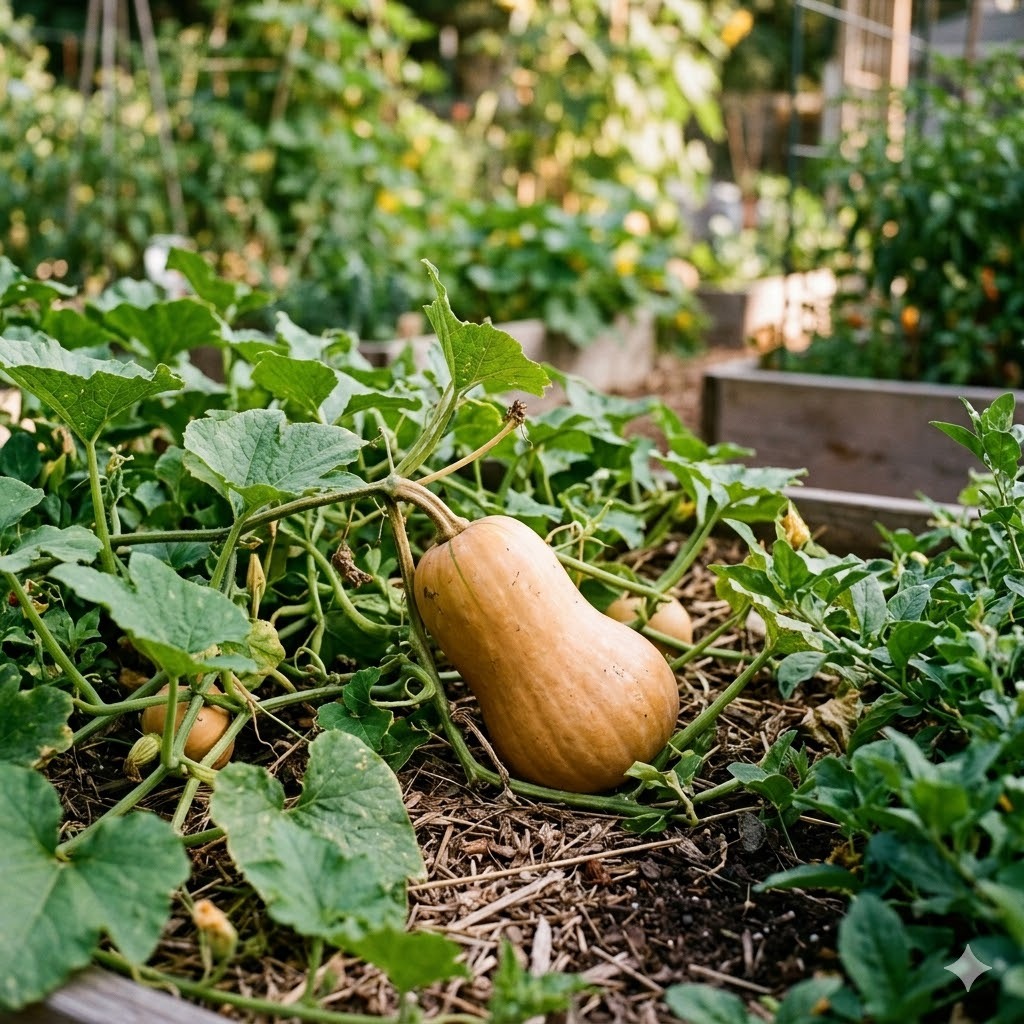
Leave the fruit on the plant as long as you can to ripen fully, ideally until the skin has turned a deep, even tan colour and hardened so that you cannot easily pierce it with a thumbnail. The stem or handle attached to the fruit will often begin to dry and cork as it ripens. A fully ripe butternut both tastes better and, crucially, stores far longer than one cut too soon.
Harvest before the first hard frosts, since frost damages the fruit and ruins its keeping quality. Cut each squash from the vine with a knife or secateurs, and be sure to leave a good length of stalk attached - several centimetres of stem. That length of stalk seals the fruit and greatly improves how well it stores, so never simply snap the fruit off, as a broken stub invites rot.
Handle the harvested fruits gently and avoid bruising or damaging the skin, as any wounds are entry points for rot in store.
Storing and preserving
This is where butternut squash earns its reputation, because a properly finished fruit stores for months, but the curing step is essential.
After cutting, cure the fruits to harden the skin and sweeten the flesh. Leave them in a warm, sunny, dry place for one to two weeks - a sunny windowsill, greenhouse bench or warm room works well - so the skin toughens fully and any small wounds seal over. Curing is what turns a merely harvested squash into one that keeps, so do not skip it.
Once cured, store the squashes somewhere cool, dry and airy, such as a cool room, pantry or frost-free shed, ideally spaced out so they are not touching and air can circulate. Kept like this, cured butternut squash keeps for many months, often right through winter and into spring. Check them over now and then and use any that show soft spots first.
If you have damaged fruit that will not store, or want variety, the flesh also freezes well: peel, cube or purée it, and freeze in portions for soups and roasting. But for most of the crop, simple curing and cool, dry storage is all you need.
Is it worth it?
Yes, provided you have the space and a reasonably warm spot. Butternut squash asks for room, a long season and a little patience, and its wandering vines are not for the smallest of plots. But in return it gives you one of the best-keeping crops in the whole garden: sweet, versatile orange flesh that, once cured, sits in a cool room and feeds you for months without any further effort.
The two things that make the difference are timing and finishing. Start the plants warm, get them out after the frosts, feed and water them through summer, and let the fruit ripen fully on the vine. Then cure the cut squashes properly before storing them cool and dry. Do that, and a handful of plants will keep you in home-grown squash long into winter, which is about as satisfying as vegetable growing gets.