How to Grow Chili Peppers: Heat You Can Actually Grow at Home
A practical, honest guide to growing chili peppers from an early sowing to a late harvest, with a strong steer toward greenhouse and windowsill warmth.
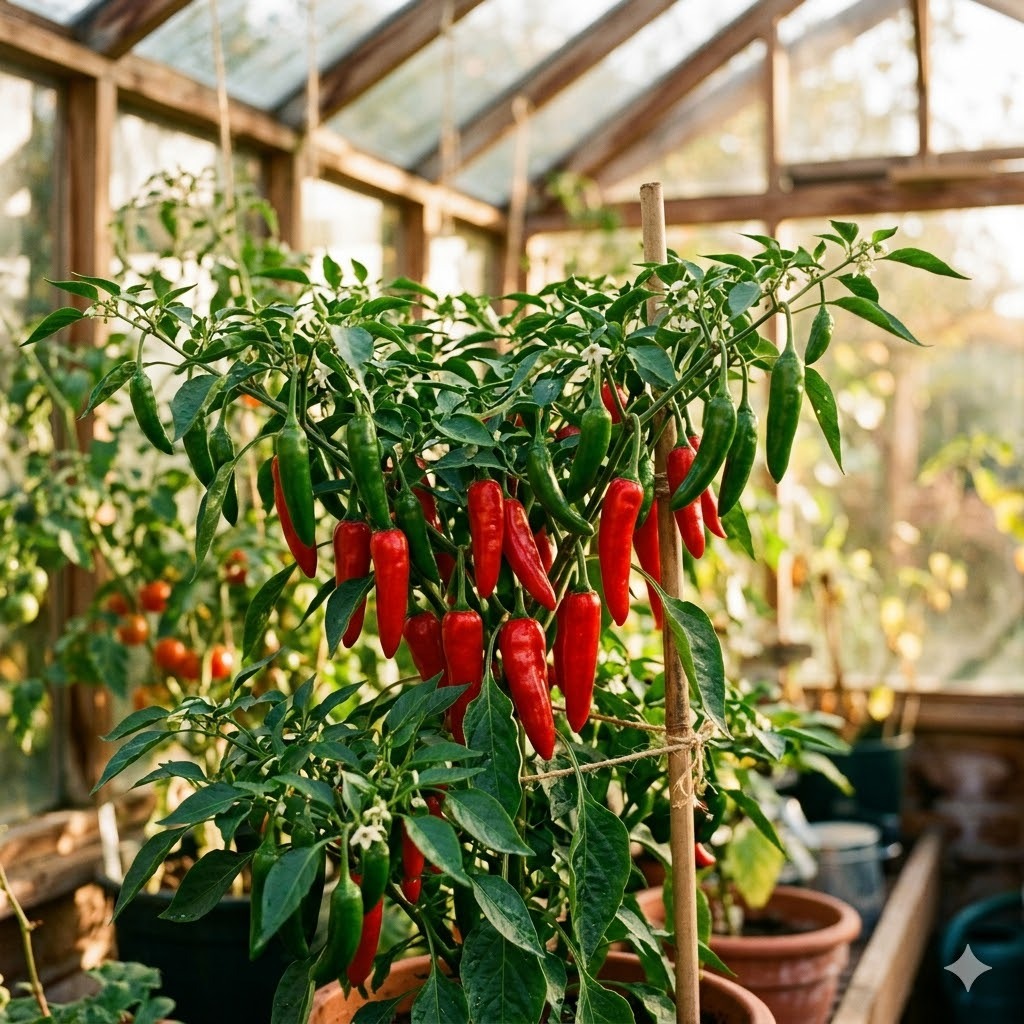
Why grow chili peppers
Chili peppers are one of the most rewarding crops for a home gardener, partly because a single well-grown plant can supply a whole household for a year. Unlike a lettuce or a courgette that you eat in bulk, you only need a few chilies at a time, so even two or three plants quickly outrun what one family can use fresh.
They are also genuinely different from the shop-bought version. Growing your own lets you pick varieties by exact heat level and flavour, harvest at the ripeness you want, and dry or preserve the surplus. And they are handsome plants - compact, glossy-leaved, and covered in colourful fruit through late summer, so they earn their place on a sunny windowsill or greenhouse bench as much for looks as for the kitchen.
The honest catch is that they need a long, warm season. This is not a sow-and-forget crop like radishes. Get the timing and the warmth right, though, and chilies are not difficult - they are just demanding about heat.
Choosing a variety
The single most important choice is heat, and it pays to be honest with yourself about how much you actually eat. Heat is measured on the Scoville scale, and the range between varieties is enormous.
- Mild to medium: Jalapeno is the classic starting point - warm rather than fierce, and versatile in cooking. Varieties like 'Hungarian Hot Wax' sit in a similar comfortable range.
- Hot: Cayenne types bring a proper kick and, usefully, have thin walls that dry well - ideal if you want flakes and powder.
- Very hot: Habanero and Scotch Bonnet are in a different league. They are fruity and delicious but seriously fierce, and a little goes a very long way. Grow these only if you know you will use that level of heat.
Beyond heat, think about your growing space. Compact and dwarf varieties are bred for pots and windowsills and crop well in a small container, whereas some of the taller, hotter types want more room and a longer season. For a first year, a reliable jalapeno plus one hotter variety gives you a useful spread without committing your whole windowsill to fire.
Sowing and starting off
Chilies have a long season, so the main rule is to sow early - late winter to early spring, earlier than most people expect. The hotter the variety, the longer it needs to ripen fruit, so the fiercest chilies benefit from the earliest possible start.
The catch with sowing early is that seeds need warmth to germinate, not light. Aim for a steady 25 to 28C, which in practice means a heated propagator or a warm spot indoors - the top of a fridge, an airing cupboard, or a sunny windowsill above a radiator. Sow the seed thinly on the surface of moist seed compost, cover lightly, and keep it warm and just damp. Germination can be slow and uneven, so do not give up on a tray too quickly; two to three weeks is normal.
Once seedlings appear, move them into good light immediately or they will stretch and flop. Prick them out into individual small pots when they have their first true leaves, handling them by the leaf rather than the fragile stem. Pot on gradually as they grow, rather than dropping a tiny plant into a huge pot of cold, wet compost.
Greenhouse or garden - where to grow
Chilies love heat, and this is where a greenhouse or a sunny windowsill genuinely changes the result. In a cool or unreliable summer, a plant grown under glass will ripen far more fruit, and ripen it hotter, than the same plant left outdoors.
A greenhouse is close to ideal. It gives the warmth chilies crave, protects them from wind and cold nights, and extends the season at both ends - you can start earlier and crop later into autumn. Grow them in large pots or growbags on the bench or floor, and give them the sunniest spot you have. On hot days, ventilate to stop the temperature spiking and to keep air moving, which also helps discourage pests.
A bright windowsill is the next best thing and works well for compact varieties. Choose a south-facing sill, turn the pots regularly so growth stays even, and be aware that glass can scorch tender leaves on the hottest afternoons.
Outdoors is possible but it is a gamble in a cool climate. If you do grow chilies outside, wait until all frost has passed and nights are genuinely warm, harden the plants off carefully over a week or two, and pick the warmest, most sheltered, sun-trap spot you have - against a south-facing wall is best. Expect a smaller crop that ripens later, and be ready to bring plants back under cover if a cold snap threatens.
Day-to-day care
Once chilies are growing, the day-to-day routine is simple but it does need consistency.
Watering is the thing to get right. Keep the compost evenly moist - not swinging between bone dry and waterlogged, as that stress causes flowers and small fruit to drop. In a warm greenhouse in high summer, that can mean watering daily. Water the compost rather than the plant, and try to do it in the morning.
Feeding matters once the plant starts to flower. Switch to a high-potash tomato feed, which is exactly what chilies want to fuel flowering and fruiting, and follow the dilution on the bottle. A weekly feed through the main season is usually about right.
Support helps once plants are laden with fruit, especially taller varieties - a simple cane and soft tie stops branches snapping under the weight. Pinching out the growing tip of young plants when they are around 20 to 30cm tall encourages a bushier plant and more fruiting stems, though it is optional. Chilies are self-fertile, but under glass a gentle daily tap of the flowering stems, or a soft brush, helps pollination when there are no insects about.
Common problems and pests
Chilies are not especially disease-prone, and most trouble comes from a handful of predictable issues.
Aphids are the main pest, particularly on plants grown under glass or indoors where natural predators are scarce. They cluster on soft new growth and the undersides of leaves, sucking sap and leaving sticky residue. Catch them early: rub them off by hand, blast them with water, or use an insecticidal soap. Keeping the air moving and not overcrowding plants makes a big difference.
Whitefly and red spider mite can also appear in hot, dry greenhouse conditions. Red spider mite in particular thrives when the air is dry, so raising humidity by damping down the floor on hot days helps hold it in check.
Flower and fruit drop is usually a symptom rather than a disease - most often caused by erratic watering, cold nights, or heat stress. Steady conditions solve most of it.
Blossom end rot, a sunken dark patch at the base of the fruit, points to uneven watering interfering with calcium uptake. Again, consistent moisture is the fix rather than any spray.
Harvesting
You can pick chilies at almost any stage, and this is one of the real pleasures of growing your own. Picked green, they are milder and have a fresher, sharper flavour. Left to ripen fully - usually to red, though some varieties turn orange, yellow, purple or chocolate - they become sweeter, deeper in flavour and noticeably hotter. The same plant gives you both, so you can pick some early and let others colour up.
Cut fruit off with scissors or snips rather than tugging, which can tear the plant. Picking regularly, especially early in the season, actually encourages the plant to keep producing, so do not be shy about harvesting the first fruits. Toward the end of the season, if frost threatens and you have unripe fruit, either bring the whole plant indoors or pick the chilies and ripen them on a windowsill.
A quick word of caution: the hot varieties really are hot. Wear gloves when picking and handling large quantities, keep your hands away from your eyes, and wash up carefully afterwards.
Storing and preserving
Because one good plant produces far more than you can eat fresh, preserving is where chilies earn their keep. The good news is that they store better than almost any other home crop.
- Drying is the classic method and suits thin-walled types like cayenne especially well. Thread whole chilies onto a string and hang them somewhere warm and airy, or use a dehydrator or a very low oven. Once brittle-dry they keep for a year or more.
- Flakes and powder: once dry, crush or grind chilies into flakes or powder for an instant homegrown spice rack. This is the natural next step after drying.
- Freezing is the easiest option of all and works beautifully - simply freeze whole chilies on a tray, then bag them. They lose a little texture but keep their heat and flavour, and you can chop them straight from frozen.
- Hot sauce is a satisfying way to use a glut of hotter varieties, blended with vinegar, salt and whatever aromatics you like, then bottled.
- Pickling in vinegar keeps sliced chilies crisp and ready for the fridge, ideal for milder types like jalapeno.
Between these methods, a single productive plant can genuinely keep you supplied until the next season's crop comes in.
Is it worth it?
Honestly, yes - with one caveat. Chilies ask for an early start and a warm spot, and if you cannot give them either, the results can be disappointing. This is not the crop to grow on a shady sill or to sow in late spring.
But if you can offer a heated propagator to start and a greenhouse or sunny windowsill to finish, few crops give back so much for so little space. A couple of compact plants take up almost no room, look good doing it, and produce more usable fruit than most households can get through - fruit you can dry, freeze, and preserve to last the whole year. For flavour, value and sheer satisfaction, chilies are one of the best things a home gardener can grow.