How to Grow Kale: The Toughest Leafy Green You Can Grow
A beginner-friendly guide to growing curly kale, cavolo nero and red Russian kale for months of reliable greens through winter.
When to sow & harvest
A rough guide for a temperate climate - shift it to your own zone and last-frost date. Greenhouse growing stretches both windows earlier and later.
Why grow kale
If you only ever grow one leafy green outdoors, make it kale. It is the toughest, most reliable brassica a beginner can plant, and it forgives most of the mistakes that flatten other crops. Slugs, cold nights, patchy watering, a season that never quite warms up - kale shrugs off far more than lettuce or spinach ever will.
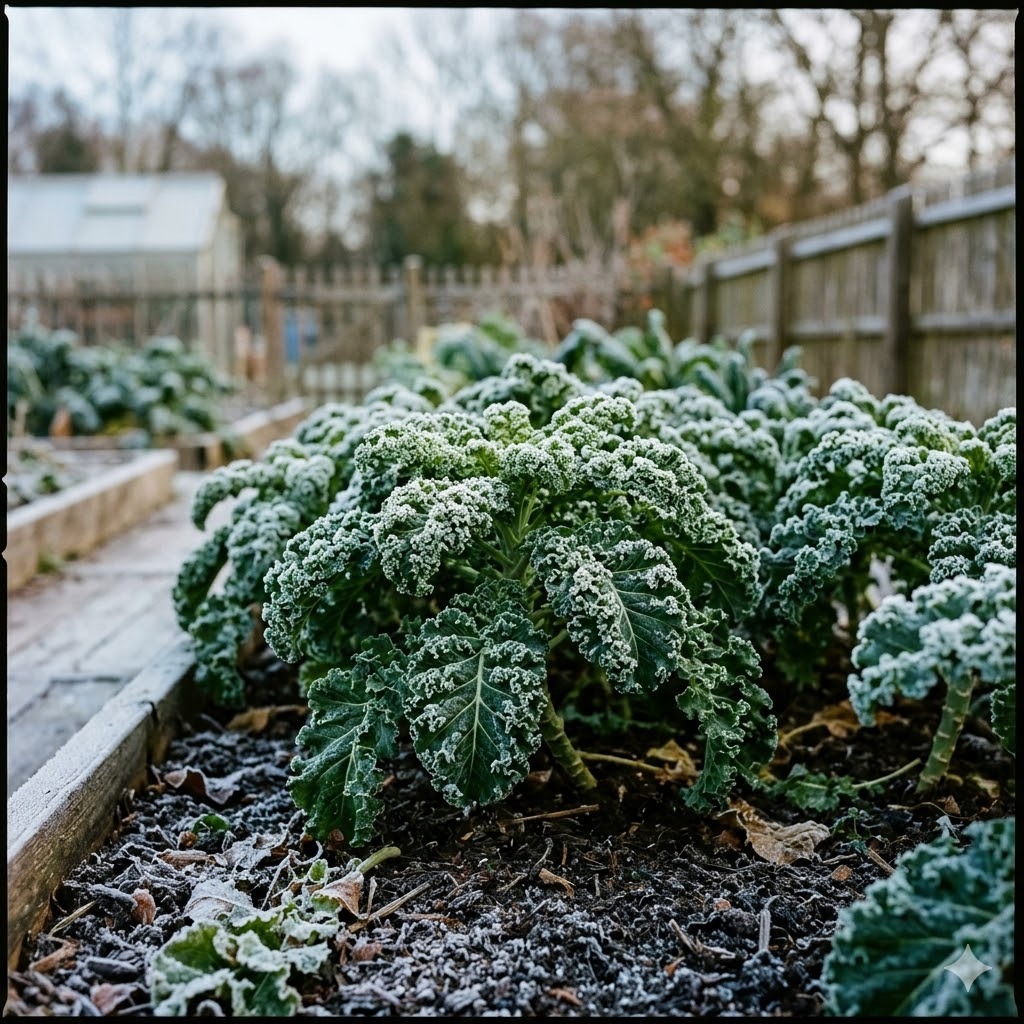
The real reason to grow it, though, is timing. Kale hits its stride when the rest of the garden is winding down. It stands right through autumn and deep into winter, and here is the part that surprises people: it actually tastes better after a hard frost. Cold weather triggers the plant to convert some of its starches to sugars as a kind of antifreeze, so a leaf picked after a cold snap is noticeably sweeter and less bitter than one picked in warm weather. While your neighbours are buying limp supermarket greens in January, you can be walking out to the garden with a knife.
On top of that, a single kale plant crops for months. You do not harvest it all at once like a lettuce. You pick a few leaves at a time and the plant keeps producing new ones, so a short row can feed a household for a long stretch. For the space and effort it takes, few crops give back more.
Choosing a variety
Kale comes in a handful of distinct types, and it is worth growing more than one because they look and taste quite different on the plate.
Curly kale is the classic. Tightly ruffled, deep green (sometimes with a bluish cast), and the hardiest of the lot. This is the one to lean on for sheer winter reliability. Varieties like Dwarf Green Curled are compact and stand up to wind and cold without much fuss.
Cavolo nero, also sold as Tuscan kale or black kale, has long, narrow, blistered dark leaves that almost look navy. It is the softer, sweeter one for cooking - the kale of Italian soups and stews - and it looks striking in a bed. Slightly less bombproof than curly kale in the very hardest winters, but still tough.
Red Russian kale has flat, oak-shaped leaves with purple stems and a milder, more tender flavour. Younger leaves are good enough to eat raw in salads. It is a beautiful plant and a nice change from the heavy-duty curly types.
For a first year, I would sow a short row each of curly kale and cavolo nero. Between them you get maximum hardiness and a good range of textures for the kitchen.
Sowing and starting off
Kale is sown from late spring through summer, which makes it a useful crop to slot in after earlier vegetables have finished. Sowing too early is a common beginner mistake - very young spring sowings can bolt or grow leggy, and you do not need kale ready until autumn anyway.
You have two easy routes:
Module trays (the tidy method). Sow one or two seeds per cell, about 1cm deep, in modules of multipurpose compost. Thin to the strongest seedling once they are up. Growing in modules gives you sturdy little plants with intact roots that transplant with almost no check to their growth. This is the method I would recommend for beginners because it keeps the seedlings safe from slugs and lets you plant out exactly where you want them.
A seedbed (the traditional method). Sow thinly in a short drill in a spare corner of the garden, then lift and transplant the seedlings to their final spot when they are around 10-15cm tall with a few true leaves. This works well and saves on compost, but the seedlings are more exposed while young.
Whichever route you take, the golden rule for all brassicas comes at transplanting: plant firm and plant deep. Set young kale plants in up to their lowest leaves and firm the soil down hard around the stem with your knuckles or heel. Loose planting is the number one cause of poor, rocking, wind-battered brassicas. If you can tug a leaf and the whole plant lifts, it is not firm enough. Water them in well straight after.
Space plants around 45cm apart in and between rows. They look absurdly far apart as seedlings, but a mature kale plant is big and needs the room.
Greenhouse or garden - where to grow
Kale is an outdoor crop, plain and simple. It does not want or need a greenhouse, and cramming it under glass would only invite whitefly and waste space better used for tomatoes. This is a plant bred by cold climates, and it is at its best standing out in the open.
Choose a spot in full sun or light shade. Kale is not fussy about sun the way fruiting crops are, so a slightly shadier bed is fine. What it does care about is the soil. Brassicas want rich, firm, fertile ground. Dig in well-rotted compost or manure before planting to give it the nitrogen it needs for leafy growth, but let the bed settle for a few weeks first, or tread it down, because kale hates loose, fluffy soil.
One more soil point worth knowing early: kale likes ground that is not too acidic. If clubroot is a known problem in your area (more on that below), adding a little garden lime to raise the pH can help. And because kale stands so tall and stays out through winter storms, an open but not brutally exposed site is ideal. In very windy gardens, staking or earthing up soil around the stems keeps tall plants like cavolo nero from rocking loose.
Day-to-day care
Once kale is planted firm and growing, it is genuinely low-maintenance. Three things keep it happy.
Steady water. Kale wants consistent moisture, especially in its first few weeks and during dry spells. It will survive drought but the leaves turn tough and bitter and growth stalls. A good soak once or twice a week in dry weather beats a daily splash. Mulching around the plants helps hold moisture and keeps weeds down.
A feed midway. In poorer soil, a nitrogen-rich feed partway through the growing season keeps the leaves coming. A liquid feed or a scattering of chicken manure pellets does the job. Do not overdo it late in the year - you want the plant hardening off, not pushing soft growth into the frost.
Keep it firm and tidy. Refirm any plants loosened by wind, remove yellowing lower leaves so they do not rot against the stem, and keep the base weed-free. That is really the whole job.
Common problems and pests
Kale is tough, but it is still a brassica, and brassicas are a magnet for a specific cast of pests. The good news is that netting solves most of them in one move.
Cabbage white caterpillars. The single biggest threat. White butterflies lay eggs on the leaves in summer, and the green caterpillars that hatch can strip a plant to its ribs in days. The fix is simple and non-negotiable: cover your kale with fine insect netting, held clear of the leaves so the butterflies cannot land and lay through it. Check the undersides of leaves for clusters of yellow eggs and rub them off when you spot them.
Pigeons. In winter, wood pigeons will happily reduce your kale to bare stalks, especially when other food is scarce. The same netting that stops butterflies stops pigeons - just make sure it stays in place through the cold months.
Cabbage root fly. The larvae attack the roots of young transplants and can kill them. A simple brassica collar - a disc of cardboard or felt around the base of each stem at planting time - stops the fly laying at soil level and is well worth the two minutes it takes.
Clubroot. A soil-borne disease that swells and distorts the roots and stunts the plant. There is no cure once it is in the soil, so prevention is everything: rotate your brassicas so they do not grow in the same bed year after year, improve drainage, and keep the soil limed and less acidic. Rotation is the real defence.
Whitefly. Tiny white flies that rise in a cloud when you brush the plant. Mostly cosmetic on kale and rarely worth chemical treatment; a strong jet of water knocks them back, and the frosts see them off.
Net early, use collars, rotate your beds, and you have handled ninety percent of what troubles kale.
Harvesting
This is where kale earns its keep. You do not pull the whole plant. Instead, pick leaves from the bottom up, leaving the growing tip and the small leaves at the top intact. Snap or cut the older, larger outer leaves off cleanly at the stem, and the plant carries on producing new leaves from the centre for months.
Start picking once the plant is established and has plenty of leaves to spare - you can usually take your first proper harvest from late summer or autumn. Take a few leaves from several plants rather than stripping one, and never take so many that you leave a plant bare.
The younger, mid-sized leaves are the best eating. Very large old leaves can be tough and are better cooked than eaten raw. And remember the frost trick: leaves picked after a cold snap are sweeter, so winter harvests are often the tastiest of the lot. As long as the growing point survives, a well-tended plant will keep cropping right through winter and often into the following spring.
Storing and preserving
Kale is best eaten fresh, and its great advantage is that the plant itself is your storage - it holds in the ground through winter, so you can pick only what you need, when you need it. That living larder beats any fridge.
When you do have a glut, or want to clear plants before they run to flower in spring, kale freezes very well. The method is blanch and freeze: strip the leaves from the tough central stalks, drop them into boiling water for about two minutes, then plunge them straight into ice-cold water to stop the cooking. Drain well, squeeze out the excess water, pack into bags or tubs, and freeze. Blanching preserves the colour, texture and nutrients, and frozen kale is perfect for tossing straight into soups, stews and stir-fries.
In the fridge, fresh-picked kale keeps for several days to a week in a bag in the salad drawer, though it is always best within a day or two of cutting.
Is it worth it?
Without hesitation, yes. Kale is close to the perfect beginner vegetable: hard to kill, productive out of all proportion to the space it takes, and generous over a long season when little else is growing. One planting in early summer can feed you from autumn right through to the following spring.
It asks for very little in return - firm planting, steady water, a net over the top, and a sensible rotation. In exchange you get fresh, home-grown greens in the depths of winter, sweeter after every frost, from plants that just keep giving. If you are new to growing vegetables and want an early, confidence-building win, kale is exactly where to start.