How to Grow Peas: The Crop That Tastes Best Before It Reaches the Kitchen
A beginner's guide to growing peas outdoors, from choosing a variety to picking pods at their sweetest.
When to sow & harvest
A rough guide for a temperate climate - shift it to your own zone and last-frost date. Greenhouse growing stretches both windows earlier and later.
Why grow peas
There is one honest reason to grow peas, and it is worth saying up front: nothing tastes like a pea eaten straight off the plant. The moment a pea is picked, its sugars start turning to starch. Within hours the sweetness fades, and by the time peas reach a shop they have travelled, been chilled, and lost most of what made them special. Even good frozen peas, which are frozen fast, cannot quite match a raw pod split open in the garden. This is the flavour you simply cannot buy.
Peas are also one of the easier and quicker crops for a beginner. They germinate readily, grow fast in cool spring weather, and reward you within a couple of months. On top of that, they are legumes, which means they work with soil bacteria to fix nitrogen from the air. In practice that means they feed themselves without much help, and they leave the soil a little richer than they found it. Chop the plants off at ground level when they finish and leave the roots in, and the next crop benefits.
So you get the best flavour in the garden, an easy start, and a soil improver all in one plant. That is a strong case for finding a spot.
Choosing a variety
The first thing to understand is that "peas" covers three different eating types, and it helps to pick deliberately rather than grabbing the first packet you see.
- Shelling peas (also called garden peas) are the classic ones. You grow the pods, then split them open and pod the peas out, discarding the pod itself. These are what most people picture.
- Mangetout are flat pods eaten whole while young, before the peas inside swell. Pick them small and they are tender and sweet. Let them go too far and they turn stringy.
- Sugarsnap peas are plump pods, also eaten whole, but with fatter peas inside. They stay crisp and sweet and are hard to stop eating raw.
On top of the eating type, varieties are either tall or dwarf. Tall types can reach well over head height and crop heavily but need proper support. Dwarf types are shorter and more manageable in a small garden. A word of caution here that catches a lot of beginners out: even so-called dwarf peas are not self-supporting. More on that below, because it matters.
For a first year, a dwarf or medium shelling variety is a fine, forgiving choice. If you have room and want the most from a small patch, a tall sugarsnap is hard to beat for sheer eating pleasure.
Sowing and starting off
Peas are sown direct into the ground, from spring through to early summer. If you have hardy round-seeded varieties, you can also sow some in autumn to overwinter for an early crop the following year, though this is a gamble in cold or wet regions.
The single most important rule is this: do not sow into cold, wet soil. Pea seeds sitting in cold, waterlogged ground will simply rot before they germinate. Wait until the soil has warmed a little and drained. If in doubt, a week or two later gives far better results than sowing too early into a cold bed.
To sow, make a flat drill rather than a narrow V-shaped one. A flat drill is a shallow, wide trench about the width of a spade blade and a couple of centimetres deep. Sow in a double row, spacing the seeds a few centimetres apart in two lines within that flat drill. This gives the plants company to lean on and makes good use of the space. Cover them back over, firm gently, and water if the soil is dry.
One real problem to plan for: mice love freshly sown pea seed and will happily dig it up overnight. If you have had this happen, the standard fix is to start peas off under cover. Sowing into lengths of guttering, or into pots or trays, lets the seed germinate safely; you then slide or transplant the young plants out into a drill once they are up. Starting in guttering is a neat trick because you can slide the whole row straight into a prepared trench with minimal root disturbance.
Greenhouse or garden - where to grow
Peas are an outdoor crop, plain and simple. They like cool, moist conditions and open air, and they do not want the heat and stuffiness of a greenhouse for their main growing.
The one exception is getting a very early start. A greenhouse or cold frame is useful for sowing a first batch into pots or guttering a few weeks before you could sow outside, protecting them from cold soil and hungry mice while they germinate. Once they are up and the weather allows, they go outside to grow on. Think of the greenhouse as a nursery for the first few weeks, not a home for the crop.
Outdoors, choose a spot in full sun or light shade with soil that holds moisture but does not sit wet. Peas are not fussy about a rich bed, since they make their own nitrogen, but they do appreciate soil that drains and stays evenly damp.
Day-to-day care
The good news is that peas are low-maintenance once they are up and supported. Most of the daily care comes down to two things: support and water.
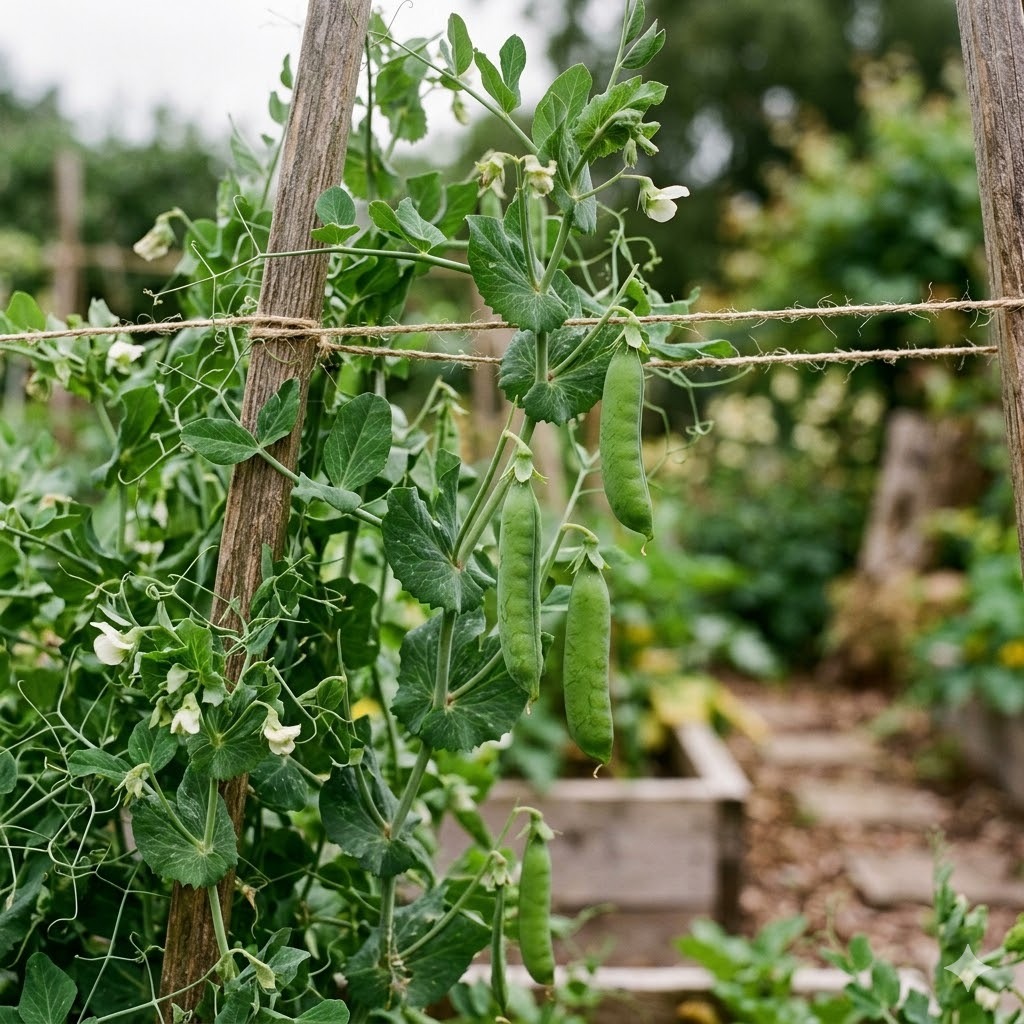
Support is not optional. This is the point that trips up more beginners than any other. Every pea plant, including dwarf ones, needs something to climb. The tendrils reach out for a grip, and without one the plants flop onto the soil, where the pods rot, slugs move in, and picking becomes miserable. Provide support early, before the plants need it, using one of these:
- Twiggy sticks, traditionally called pea sticks - prunings pushed into the ground along the row for the tendrils to scramble up. Cheap, effective, and looks the part.
- Netting or mesh stretched between posts or canes. Choose a mesh with holes big enough to get your hand through for picking.
Push supports in at sowing time or as soon as the seedlings emerge, so the plants find them straight away.
Water is the other job. Peas need to be kept well watered, and this matters most at two stages: when they are flowering and when the pods are filling. Dry soil at flowering means fewer pods; dry soil during pod-fill means smaller, poorer peas. Give them a good soak in dry spells rather than a daily splash, aiming to keep the root zone evenly moist.
Beyond that, keep on top of weeds while the plants are small, and let the nitrogen-fixing roots do the feeding for you.
Common problems and pests
Peas are easy, but a handful of problems are worth knowing so they do not catch you out.
- Mice dig up sown seed, as covered above. The fix is to start seed under cover in guttering or pots and transplant out.
- Birds peck at young seedlings and can strip a newly emerged row. Netting or twiggy cover over the seedlings until they toughen up solves this cheaply.
- Pea moth is the classic cause of maggoty peas. The moth lays eggs on flowering plants, and the larvae end up inside the pods eating the peas. Two honest defences: cover the plants with fine mesh during flowering to keep the moth off, or time your sowings so the plants flower outside the moth's main active period. Early and late sowings often dodge the worst of it.
- Powdery mildew tends to show up late in the season as a white, dusty coating on leaves, usually in warm dry spells. Good spacing, decent watering, and picking crops before they exhaust themselves all help. Late sowings are most at risk.
None of these is a reason not to grow peas. They are the normal wear and tear of the crop, and most beginners get a good harvest despite them.
Harvesting
Picking is where peas reward attention, and the rule is simple: pick regularly and pick often. A pea plant is trying to set seed. As long as you keep removing the pods, it keeps producing more to try again. The moment you let pods swell and mature on the plant, it decides its job is done and stops cropping. Overripe pods, in other words, shut production down.
For shelling peas, pick when the pods are well filled but still bright and fresh; peas that have gone dull and hard in the pod are past their best. For mangetout, pick young and flat, before the peas inside swell. For sugarsnap, pick when the pods are plump and crisp. Go over the plants every couple of days in the peak of the season - you will be surprised how fast they come.
And take the advice everyone gives for a reason: eat some raw, right there in the garden, before they ever see the kitchen. That is the whole point.
Storing and preserving
Peas are at their best eaten fresh, ideally within an hour or two of picking. That is not always possible, so it helps to know they preserve very well by one route in particular.
Peas freeze superbly. Freezing is the standout method because it locks in the sweetness before the sugars turn to starch. The trick is to blanch them briefly first: drop the podded peas into boiling water for a minute or two, then plunge them into cold water to stop the cooking, drain, and freeze. Blanched and frozen this way, they keep their colour and taste for months and are far better than most shop-bought frozen peas.
If you have a glut, freezing is the answer. There is little point trying to keep fresh peas in the fridge for long; the flavour drains away fast, which is exactly why growing your own is worth it in the first place.
Is it worth it?
Honestly, yes, and more than most crops. Peas are easy and quick, forgiving of beginner mistakes, and they improve the soil for whatever follows. The main effort is putting up supports and keeping the plants watered at flowering and pod-fill, neither of which is hard.
The real payoff is a flavour you cannot buy at any price, because the very thing that makes a fresh pea special is the thing that disappears on the journey to a shop. Grow a double row up some twiggy sticks, pick often, eat a handful raw, and freeze the rest. For the space and effort involved, few vegetables give back so much.